Table of Contents
A common trouble point that many people come across when developing a PHP application is deploying their changes automatically to a web server. In fact, it doesn't need to be complicated, GitHub Actions is a CI/CD platform that can be used freely by anyone with a GitHub account (within certain limits).
Here's an example of how to build an application with Composer and a Gulp task and deploy it to a remote server. However, if your application is simpler, you can always remove a few steps.
Prerequisites
This example shows how to set up a NGINX + PHP-FPM stack along with a deployment on an Ubuntu server. You can skip this section if you already have a working web server.
Installing NGINX and PHP-FPM
Start by installing NGINX (the web server) and PHP-FPM (the PHP interpreter) on the server. The following command will install PHP 8.3, but you can use a different version depending on your requirements.
sudo add-apt-repository ppa:ondrej/php
sudo apt update
sudo apt install nginx php8.3-fpm
At this point, you should also install any required PHP extensions by installing the php-[ext] packages.
Creating a deployment user
Here we're creating a user for our deployment. The GitHub actions runner will log in as this user and copy our site files to the web root.
sudo adduser deployuser
Keep pressing enter when prompted for a password, as we won't be needing one. We'll log in as the user using an SSH key. You can skip the prompts and just use the default values.
info: Adding user `deployuser' ...
info: Selecting UID/GID from range 1000 to 59999 ...
info: Adding new group `deployuser' (1001) ...
info: Adding new user `deployuser' (1001) with group `deployuser (1001)' ...
info: Creating home directory `/home/deployuser' ...
info: Copying files from `/etc/skel' ...
New password:
Retype new password:
No password has been supplied.
New password:
Retype new password:
No password has been supplied.
New password:
Retype new password:
No password has been supplied.
passwd: Authentication token manipulation error
passwd: password unchanged
Try again? [y/N] N
Changing the user information for deployuser
Enter the new value, or press ENTER for the default
    Full Name []:
    Room Number []:
    Work Phone []:
    Home Phone []:
    Other []:
Is the information correct? [Y/n]
info: Adding new user `deployuser' to supplemental / extra groups `users' ...
info: Adding user `deployuser' to group `users' ...
Generating an SSH key
To log in to our server remotely, we'll need an SSH key. So, switch to the deployment user.
sudo su deployuser
From here, we can generate our key. You can use the default values and a passphrase is not necessary.
ssh-keygen
By default, this will save the public (id_ed25519.pub) and private (id_ed25519) keys to the .ssh directory.
Generating public/private ed25519 key pair.
Enter file in which to save the key (/home/deployuser/.ssh/id_ed25519):
Created directory '/home/deployuser/.ssh'.
Enter passphrase (empty for no passphrase):
Enter same passphrase again:
Your identification has been saved in /home/deployuser/.ssh/id_ed25519
Your public key has been saved in /home/deployuser/.ssh/id_ed25519.pub
The key fingerprint is:
SHA256:LbVVvBXUsm8ilJ0qOLQNsgPEPwB/fPaVgo3Gs80vp3k deployuser@jmh-public
The key's randomart image is:
+--[ED25519 256]--+
|  .o         .ooo|
|   .+. . +   oo o|
|   ..oo O + +o * |
|    ..++oO =o =  |
|     . =S=*. . . |
|      o +.o.o . o|
|       . ...o. o |
|           =E    |
|          o.     |
+----[SHA256]-----+
To allow logging in as this user, we need to add the public key to the authorized_keys file and adjust the file permissions accordingly.
cat ~/.ssh/id_ed25519.pub >> ~/.ssh/authorized_keys
chmod 600 ~/.ssh/authorized_keys
Setting up a web server
In order to configure our web server, we need a directory where we can serve the files. Typically, this resides in /var/www. We need to make sure that the deployment user has write permissions and that the web server has read permissions.
sudo mkdir /var/www/mysite
sudo chown deployuser:www-data /var/www/mysite
sudo chmod 755 /var/www/mysite
Create the following file in the NGINX site configuration directory to configure our site. Replace the example domain with your own.
sudo vim /etc/nginx/sites-available/mysite.conf
server {
    listen 80;
    root /var/www/mysite
    index index.php;

    server_name example.com www.example.com;
    autoindex off;

    # try to serve file directly, fallback to index.php
    location / {
        try_files $uri /index.php$is_args$args;

        location ~ \.php$ {
            include snippets/fastcgi-php.conf;
            fastcgi_pass unix:/var/run/php/php8.3-fpm.sock;
        }
    }
}
Then, create a symbolic link from sites-available to sites-enabled to enable this configuration.
sudo ln -s /etc/nginx/sites-available/mysite.conf /etc/nginx/sites-enabled/mysite.conf
Run a syntax check before restarting NGINX to make sure everything is ok.
sudo nginx -t
nginx: the configuration file /etc/nginx/nginx.conf syntax is ok
nginx: configuration file /etc/nginx/nginx.conf test is successful
Finally, you can then restart NGINX to apply the changes.
sudo systemctl restart nginx
Deploying a SSL certificate with Let's Encrypt
To deploy an SSL certificate, install the certbot utility using the official instructions. You can then easily provision a certificate using the following command by replacing the example domain with your own:
sudo certbot --nginx -d example.com -d www.example.com
This will update your NGINX configuration to serve the site with an SSL certificate and will handle certificate expiration for you.
Creating a workflow
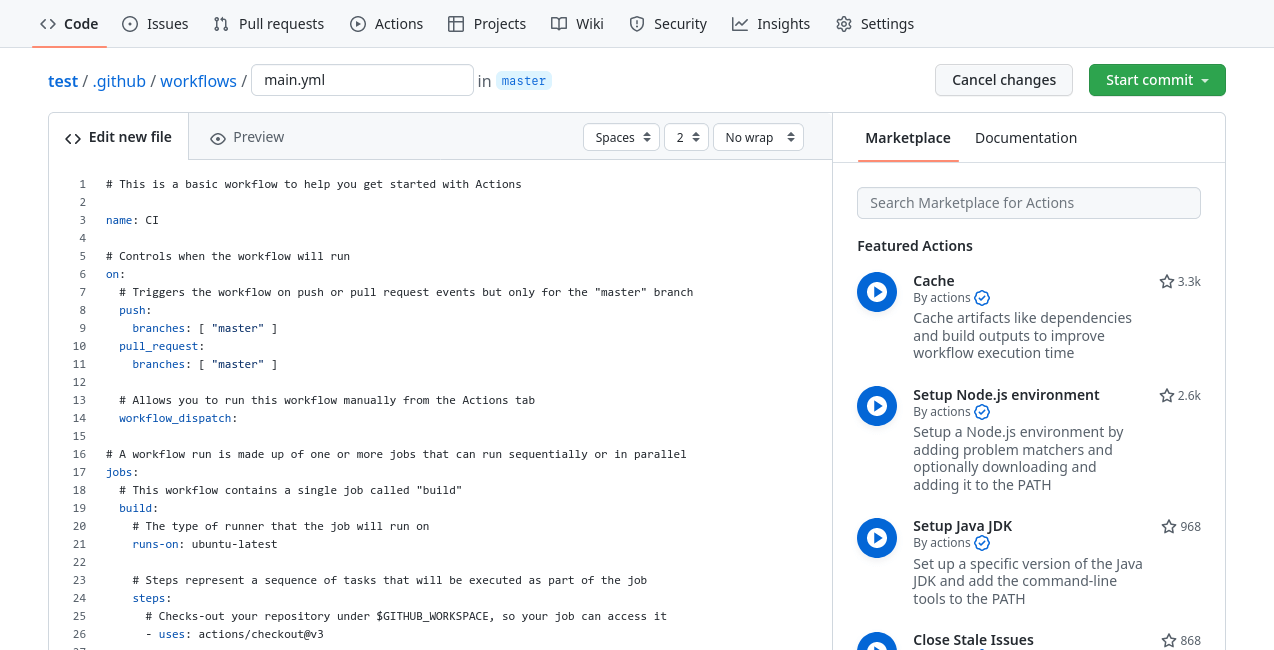
GitHub Actions are configured using a YAML file in your repository. In this file, you can create jobs with a certain number of steps. In fact, there are many pre-made jobs (called actions) available on the GitHub Marketplace, these can be combined to create a pipeline.
First of all, it goes without saying, but the code must be hosted on GitHub for this to work. Once that's taken care of, start by creating a file using the following directory structure in your project, either via your local machine or the web interface:
.github/workflows/main.yml
We're using main as the name of our workflow, but it could be anything you want. It can be created easily by clicking on the "Actions" tab and selecting a blank workflow.
Setting up the pipeline
In this example, we're going to be creating a couple of jobs with multiple steps: one to build and one to deploy. The first step of our pipeline is to tell it when to run. In our case, we want it to run whenever there is a commit or push on the main branch.
However, with such a structure, we must exercise branch discipline to prevent a work in progress build from being deployed:
- The
mainbranch refers to our production state - The
developbranch refers to our development state
When changes are ready to be deployed, the develop branch can be merged into the main branch.
Naming and trigger
The first part of the file contains the name of the pipeline as well as the trigger condition. In this case, it will run when a commit is made on the main branch.
name: Build and Deploy

on:
  push:
    branches: [ main ]
Build job
The following configuration is used to create our build job. Here are a few notable properties:
runs-on: This determines which Docker image is used to run our pipeline. In this case, we're using a standard Ubuntu image.env: These are the environment variables that we want to set. SettingCOMPOSER_NO_DEVto1will prevent Composer from resolving development dependencies.uses: This refers to the GitHub Action being used for this step.
jobs:
  build:
    runs-on: ubuntu-latest
    env:
      COMPOSER_NO_DEV: 1
    steps:
      - name: Checkout
        uses: actions/checkout@v4

      - name: Setup PHP
        uses: shivammathur/setup-php@v2
        with:
          php-version: 8.3

      - name: Install Composer packages
        uses: ramsey/composer-install@v3

      - name: Upload artifact
        uses: actions/upload-artifact@v4
        with:
          name: app
          path: |
            application
            vendor
            public
In this job, we have 4 steps:
- Check out our code
- Provide a PHP 8.3 environment
- Install the required Composer packages
- Upload the built application as an artifact, only the required directories and files are copied
Build static assets with Node (optional)
If you use a task runner such as Gulp to automate building your static assets such as compiling SCSS, minifying JS or optimising images. This job is a good place to run it. Adding the following steps to the build job will provide a Node environment, install the required packages and run a npm script.
- name: Install Node packages
  run: npm install

- name: Build assets
  run: npm run build
In the last step, you can run any npm script defined in your package.json file. If required, add NODE_ENV: production to the environment.
Deploy job
The last part of the process is to deploy our artifact to a web server. We're going to use the rsync utility, which is a tool that allows you to synchronise a local directory and a remote directory. It will create missing files, update changed files and delete removed files for us.
  deploy:
    runs-on: ubuntu-latest
    needs: build
    steps:
      - name: Download artifact
        uses: actions/download-artifact@v4
        with:
          name: app

      - name: Deploy with rsync
        uses: burnett01/rsync-deployments@7.0.1
        with:
          switches: -avzr --delete
          path: .
          remote_path: /var/www/mysite
          remote_host: ${{ secrets.DEPLOY_HOST }}
          remote_user: ${{ secrets.DEPLOY_USER }}
          remote_key: ${{ secrets.DEPLOY_KEY }}
This job uses the needs property, so it depends on the success of the build job. First, we download the previously uploaded artifact from the previous job and subsequently upload it to our web server root. In our case, we're using an SSH private key rather than a password. You can check the rsync deployment repo for more options.
On your server, you will need to make sure that your user has write access on the web server root. Either by changing the owner of the directory to the deployment user or adding the deployment user to www-data and making the directory group writable. This is explained in the 'Prerequisites' section.
Notice that some values are stored in the secrets variable, these are configured in the repository settings.
Adding secrets
Navigate to your repository settings, the Secrets section and the Actions menu to edit the secrets.
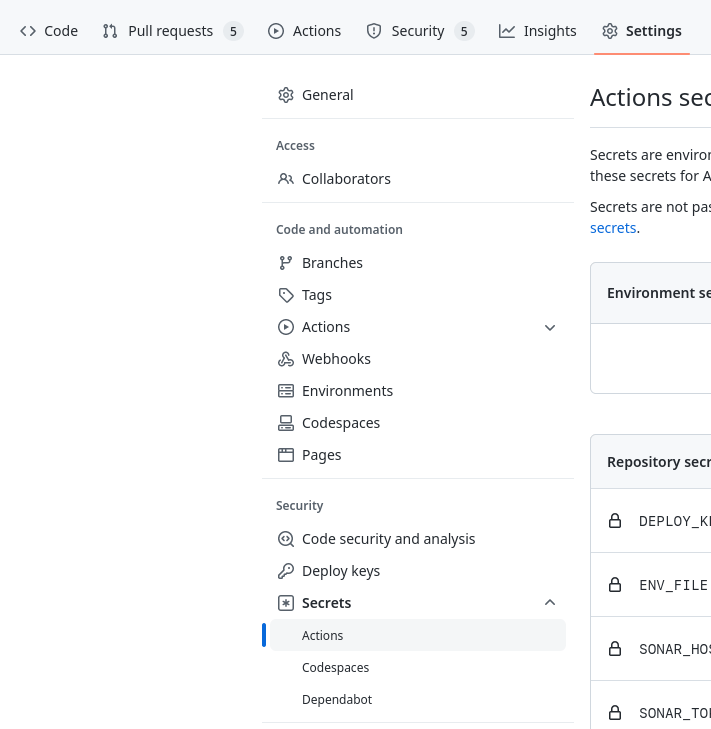
Using the "New repository secret", you can create a new secret variable.
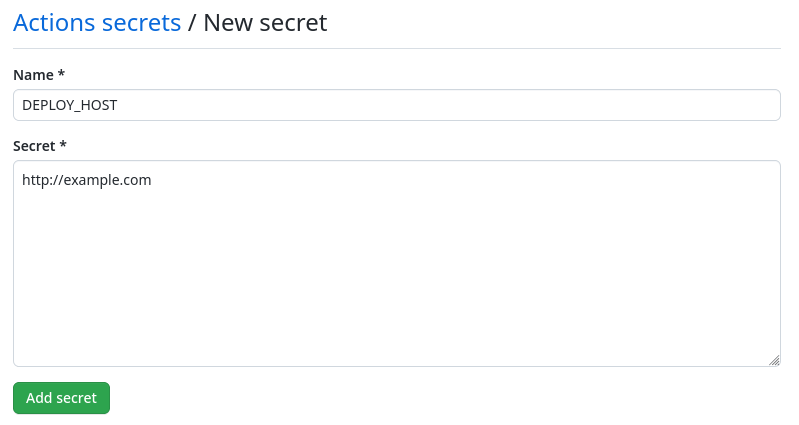
In this example, you will need to create the following secrets:
- DEPLOY_HOST: The hostname of your web server
- DEPLOY_USER: The user used to deploy on the server
- DEPLOY_KEY: The private key used to log in as the user
If you followed the 'Prerequisites' section, to obtain the private key for logging in as the deployment user, you can view the contents of the file generated previously.
cat ~/.ssh/id_ed25519
Running the pipeline
Now, when a commit is pushed to the main branch, the pipeline will run. You can view the result from the "Actions" tab.
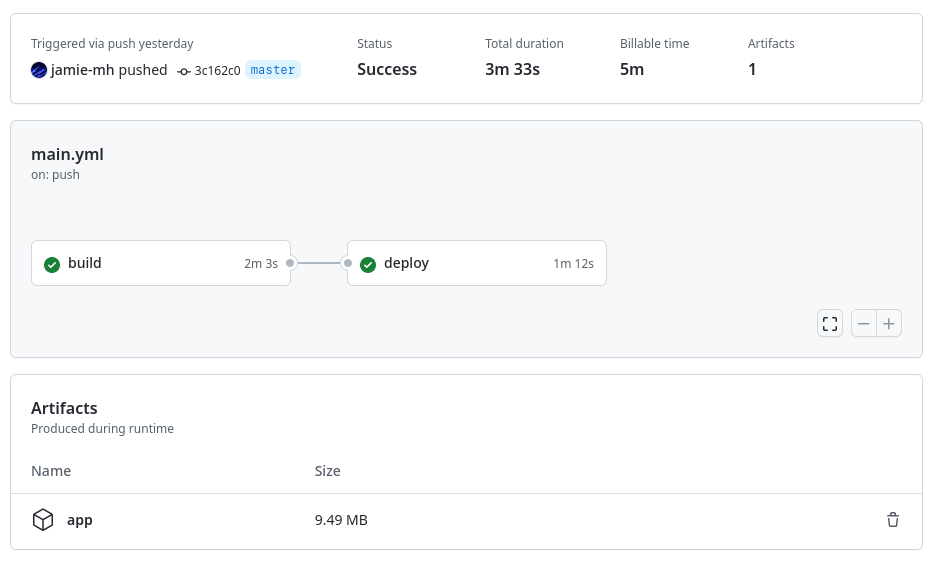
The screenshot shows the two jobs that ran and produced a single artifact. Once completed, the server is up-to-date with the latest changes.
Where to go from here
GitHub Actions is a very flexible CI/CD platform, and there are many improvements that could be made to this example. Here are a few ideas:
- Running PHPUnit tests and producing a unit test report
- Migration of a database schema
- Uploading static assets to an S3 bucket or equivalent
- Clearing NGINX/Redis caches
- Deploying to multiple load-balanced servers for no downtime
- Deploying to a staging environment depending on the branch
The possibilities are endless, all depends on what you aim to achieve with your application.
Real world example
For the Authenticator Pro website, I've used a similar setup to the one described in this blog post with a few additions:
- PHP application with the Composer package manager
- Bundled JS and modules using Gulp
- Compiled and minified SCSS using Gulp
- Environment file for secrets
The site is open-source on GitHub and you are free to adapt the workflow YML to your own purposes.